Nutter Butter Turkey Cookies
These adorable Nutter Butter Turkey Cookies are the perfect no-bake treat for Thanksgiving. They’re festive, kid-friendly, and come together in just 30 minutes. Plus, they’re almost too cute to eat… almost.
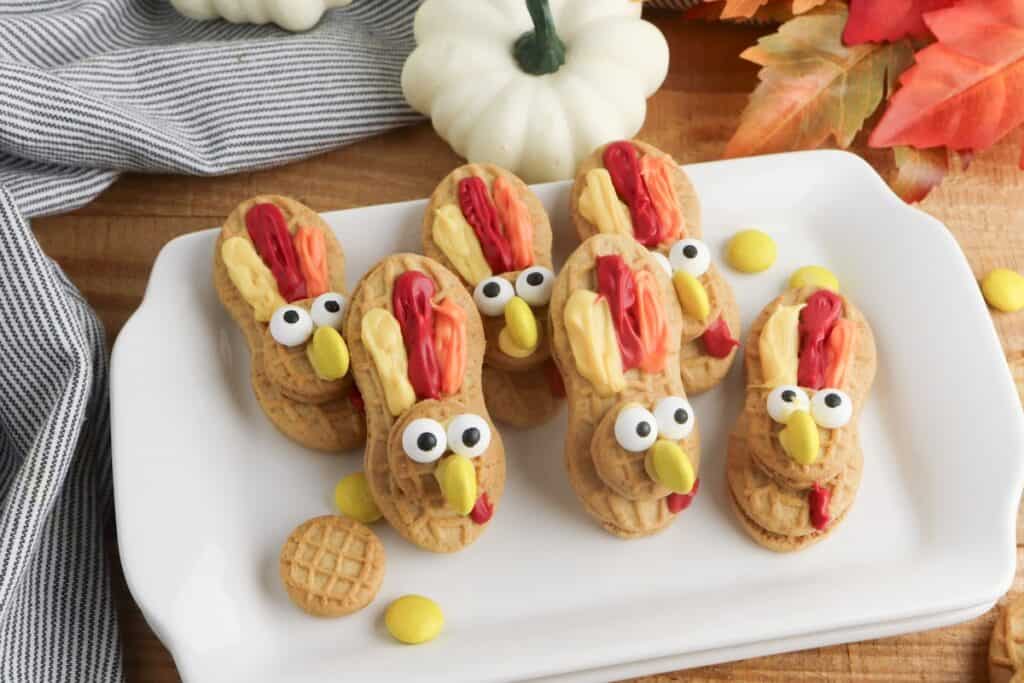
These cookies aren’t just cute – they’re the kind of treat that makes people smile the moment they see them. They’re quick to put together, easy to decorate, and always a conversation starter on our dessert table.
If you’re looking for more fun holiday sweets, check out my Nutter Butter Owls, Nutter Butter Ghost Cookies, Football Nutter Butters, No Bake Maple Pecan Cookies, and 3-Ingredient Chocolate Acorns.

Why You’ll Love This Recipe
- Fun for all ages – a great project for kids and adults alike.
- No baking required, so you can make them ahead without turning on the oven.
- Perfect for Thanksgiving dessert tables or as edible party favors.
- Easy to customize with different candy colors or decorations.
Ingredients

- Nutter Butters: These peanut-shaped cookies form the base of your turkey bodies. Their smooth surface makes decorating a breeze.
- Nutter Butter Bites: These mini versions are perfect for creating the turkey’s head, giving the cookies a 3D effect.
- Yellow Candy Melts: These act as the “glue” for attaching candy eyes and beaks, while adding a bright pop of color.
- Orange Candy Melts: Used to create colorful tail feathers, adding warmth and autumn vibes to the design.
- Red Candy Melts: Perfect for adding the turkey’s wattle, giving each cookie its signature look.
- Candy Eyes: These instantly bring your turkeys to life, making them look cute and playful.
- Yellow M&Ms or Reese’s Pieces: These serve as the beak, adding color contrast and just the right shape for a turkey face.
Substitutions and Additions
- Use Chocolate Candy Melts: Swap out yellow or orange for chocolate if you prefer a more rustic color palette.
- Peanut-Free Option: Use similar sandwich cookies (like Vienna Fingers) if peanut allergies are a concern.
- Different Candy Eyes: Draw eyes using melted chocolate and a toothpick if you can’t find candy eyes.
- Seasonal Variations: Try red and green candy melts for a Christmas turkey cookie twist.
Step by Step Instructions
Step 1: Prepare the Candy Melts
Melt the yellow, orange, and red candy melts in separate microwave-safe bowls, heating in 20–30 second intervals and stirring until smooth.
Transfer each color to its own piping bag (or zip-lock bag) and snip a small tip so you can pipe thin lines and small dots without the candy running everywhere.
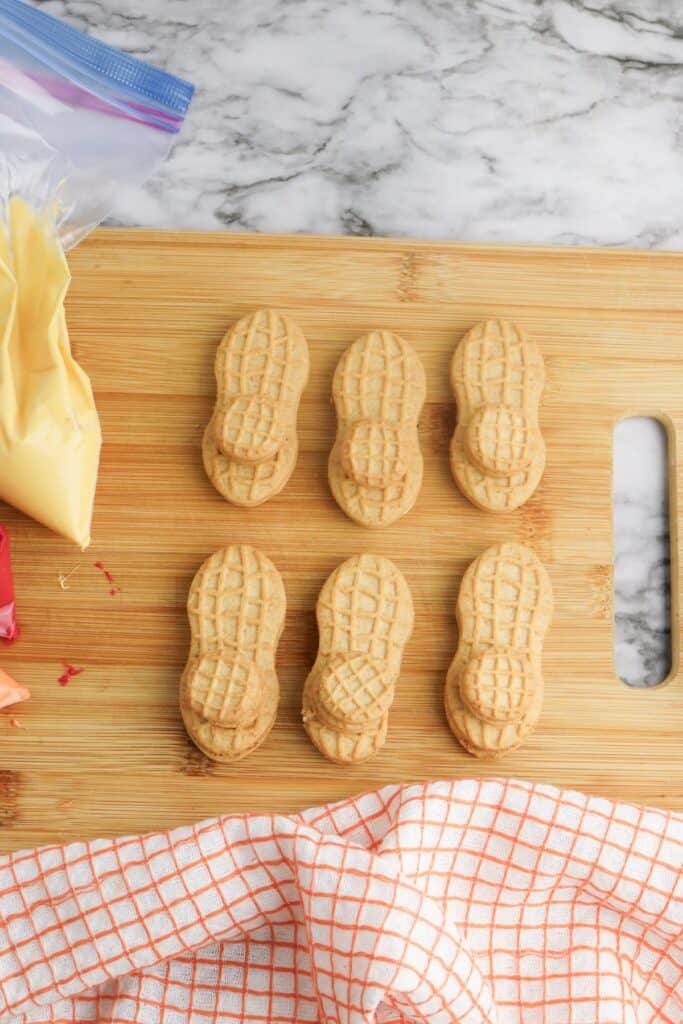
Step 2: Build the Turkey Body
Arrange all the Nutter Butters on a parchment-lined baking sheet. Pipe a small dollop of any candy melt color on the top edge of each cookie, then gently press a Nutter Butter Bite on top to form the turkey’s head. Hold it in place for a second so it sticks.

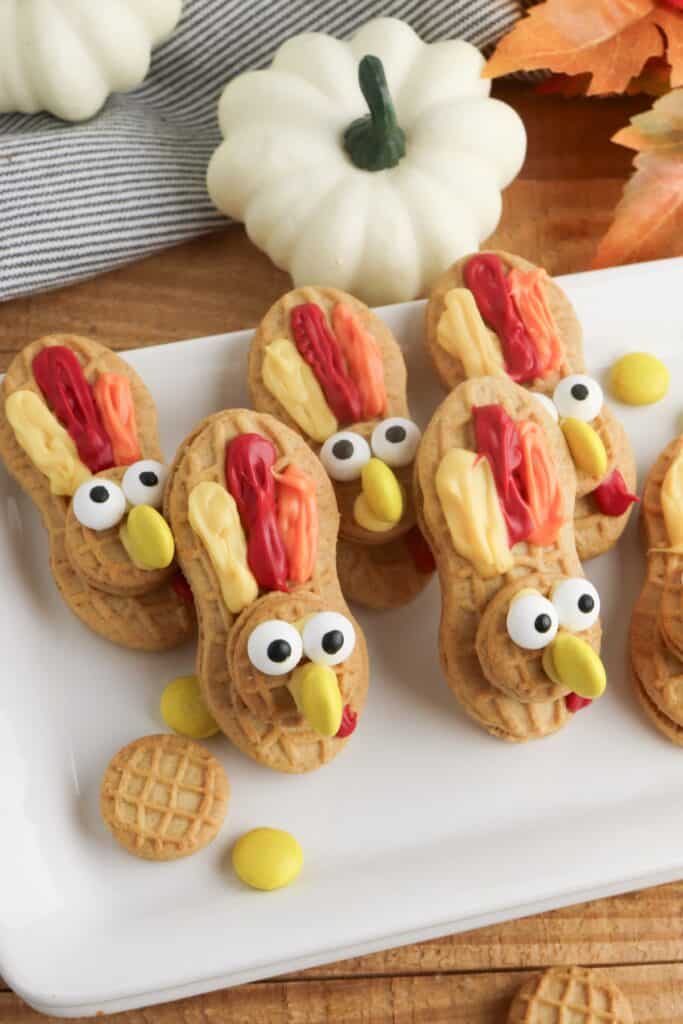
Step 4: Make the Feathers
Above each head, pipe short curved lines in yellow, orange, and red to look like tail feathers. Alternate the colors and slightly overlap them for a fuller, layered look.

Step 4: Add the Face
Using the yellow candy melts, pipe two small dots on the head and press on the candy eyes. Add another small yellow dot just below the eyes and place an M&M or Reese’s Piece on top to make the beak.
Step 5: Finish the Details
Use the red candy melts to pipe a small teardrop shape next to the beak for the wattle. Let all cookies sit at room temperature until the candy is fully hardened before moving or serving.

Tips and Notes
- Work Quickly with Candy Melts: They can harden fast, so prepare your piping bags before you start assembly.
- Use a Steady Surface: Decorating on a flat, stable surface will help prevent the cookies from shifting.
- Batch Your Steps: Instead of making one cookie at a time, do each step for all cookies before moving to the next.
- Let Them Set Fully: Allow the candy melts to harden completely before stacking or storing to prevent smudging.
Serving Suggestions
- Serve at Thanksgiving Dessert Table: Arrange the cookies on a platter surrounded by mini pumpkins or fall leaves for a festive touch.
- Package as Gifts: Wrap each cookie in a clear bag with a ribbon for a cute take-home treat.
- Place Card Holders: Write guest names on tags and attach them to each cookie for a fun table decoration.
Storage and Reheating Instructions
- Room Temperature Storage: Keep cookies in an airtight container for up to 5 days.
- Refrigeration: Store in the fridge if your home is warm, but bring to room temperature before serving for the best texture.
- Freezing: Not recommended, as candy melts can develop condensation and discolor when thawed.

Nutter Butter Turkey Cookies
Ingredients
- 30 Nutter Butter cookies
- 30 Nutter Butter Bites
- 1 cup yellow candy melts
- 1 cup orange candy melts
- 1 cup red candy melts
- 60 candy eyes
- 30 yellow M&Ms or Reese’s Pieces
Instructions
- Melt the yellow, orange, and red candy melts in separate microwave-safe bowls, heating in 20–30 second intervals and stirring until smooth.
- Transfer each color to its own piping bag (or zip-lock bag) and snip a small tip so you can pipe thin lines and small dots without the candy running everywhere.
- Arrange all the Nutter Butters on a parchment-lined baking sheet.
- Pipe a small dollop of any candy melt color on the top edge of each cookie, then gently press a Nutter Butter Bite on top to form the turkey’s head. Hold it in place for a second so it sticks.
- Above each head, pipe short curved lines in yellow, orange, and red to look like tail feathers. Alternate the colors and slightly overlap them for a fuller, layered look.
- Using the yellow candy melts, pipe two small dots on the head and press on the candy eyes.
- Add another small yellow dot just below the eyes and place an M&M or Reese’s Piece on top to make the beak.
- Use the red candy melts to pipe a small teardrop shape next to the beak for the wattle.
- Let all cookies sit at room temperature until the candy is fully hardened before moving or serving.