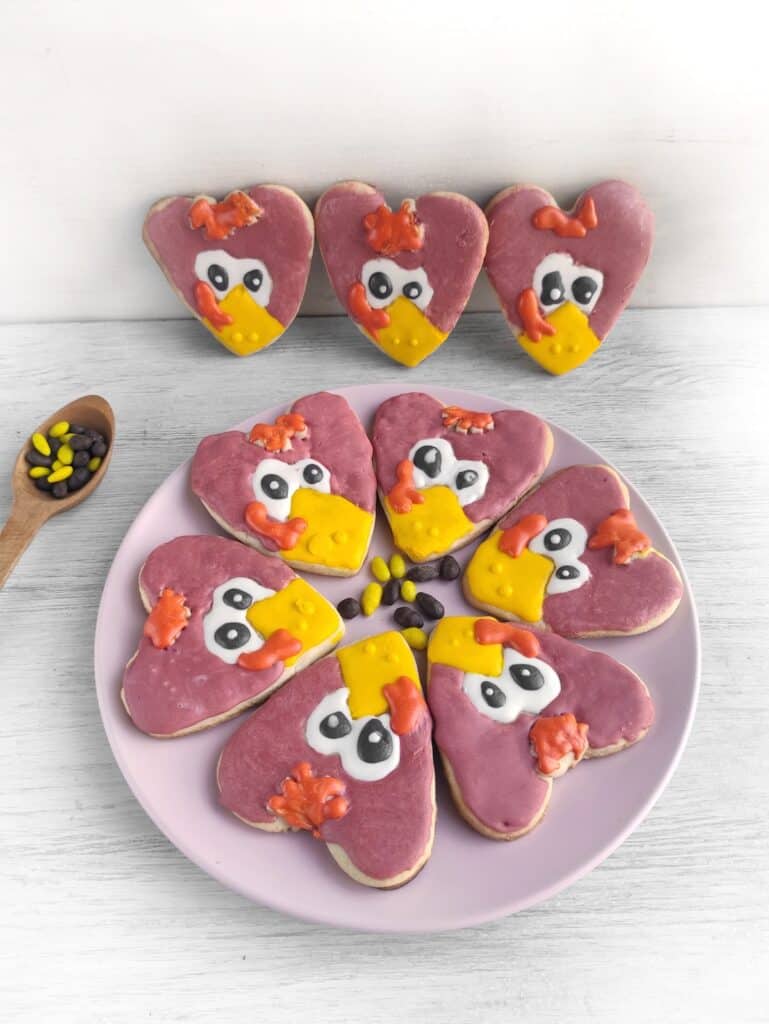
Turkey Sugar Cookies Recipe
Thanksgiving is all about comfort, tradition, and family time, and what better way to celebrate than with cookies shaped like little turkeys? These sweet treats aren’t just fun to make – they double as festive table décor and edible favors. With simple ingredients and a bit of creativity, you’ll have cookies that are as cute as they are delicious.

I love baking holiday cookies because it’s something everyone can get involved in. Decorating turkey sugar cookies becomes a memory-making activity where kids and adults alike can let their creativity run wild.
If you’re looking for more holiday baking inspiration, you might also enjoy my 3-Ingredient Chocolate Acorns or Mini Cream Cheese Pumpkin Cakes.
Why You’ll Love This Recipe
- A fun, family-friendly baking project.
- Uses simple ingredients you probably already have.
- Perfect for Thanksgiving dessert tables or edible gifts.
- Deliciously soft sugar cookies with just the right touch of sweetness.
Ingredients
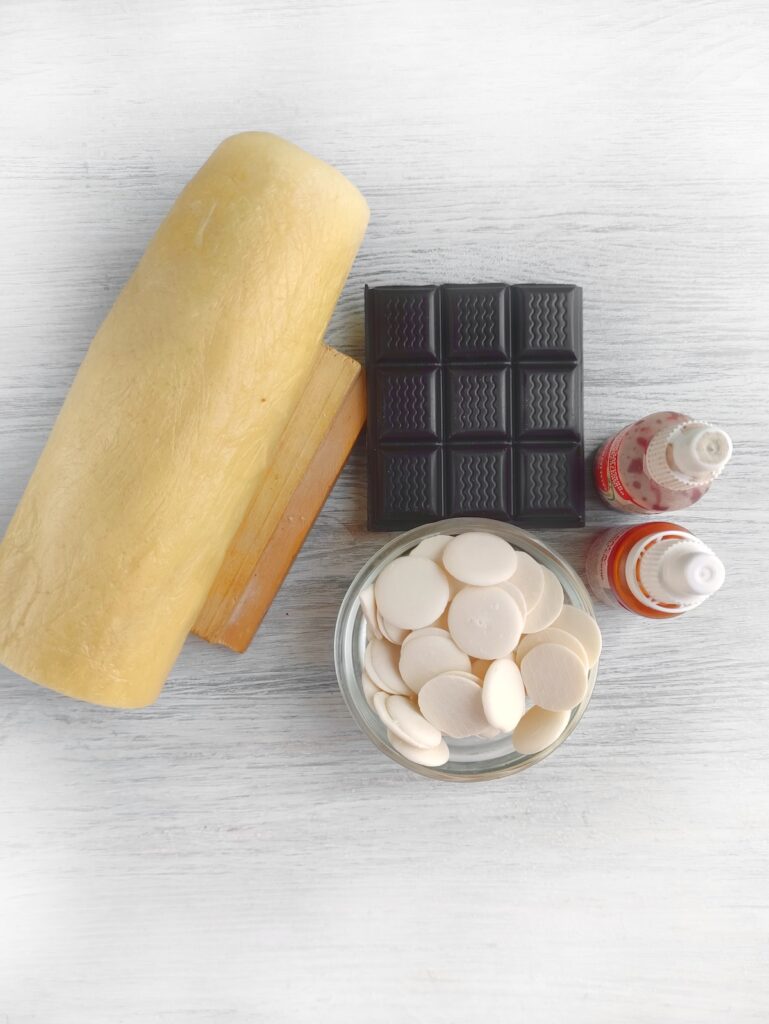
- Sugar Cookie Dough: The soft, buttery base that gives your cookies their chewy center and slightly crisp edges. You can use homemade dough or store-bought for convenience.
- White Chocolate Chips/Wafers: Melted down, they create a smooth, sweet “icing” for decorating. They also set up nicely, so your designs stay in place.
- Food Coloring: Yellow, red, and brick tones bring your turkeys to life, turning simple cookies into colorful holiday creations.
- Dark Chocolate or Sugar Eyes: These tiny accents add personality to each cookie and really make your turkeys look animated and fun.
Substitutions and Additions
- Cookie Dough Base: Swap sugar cookie dough for gingerbread dough if you’d like a spiced version.
- Chocolate Options: Use candy melts instead of white chocolate if you want brighter colors that set quickly.
- Decorations: Add candy corn feathers for a playful touch, or use mini M&Ms for colorful accents.
- Gluten-Free: Pick up a gluten-free sugar cookie dough if needed – decorating works just the same.
Step by Step Instructions
Prepare and Cut the Dough
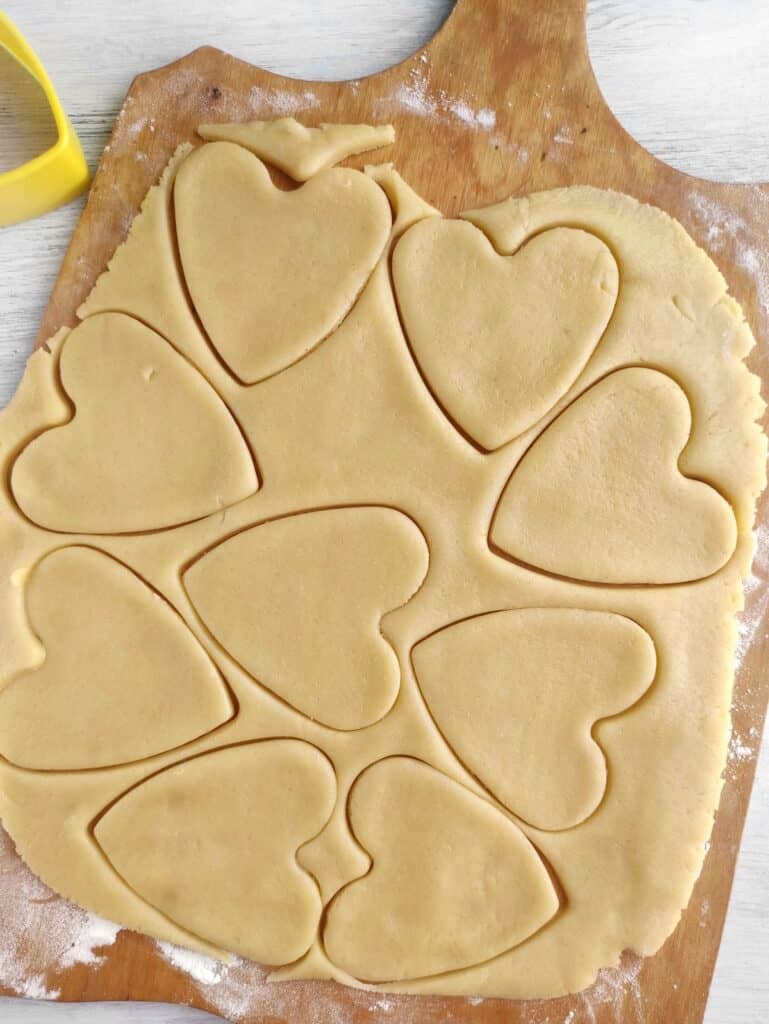
Lightly flour your surface and roll the sugar cookie dough into a layer about ⅓–¼ inch thick. Use a heart-shaped cookie cutter to cut out shapes.
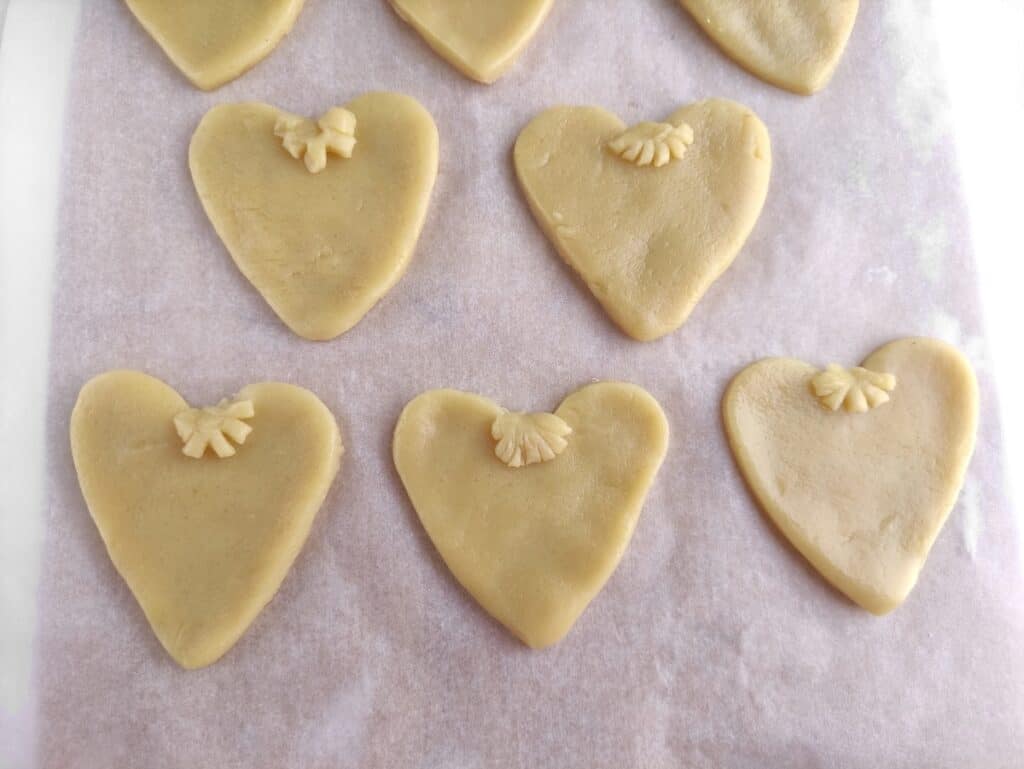
Place them on a parchment-lined baking sheet, and from the leftover dough, form small scallops to press onto the top of each heart (this will create the turkey’s feathered look).
Chill and Bake the Cookies
Refrigerate the shaped cookies for 1–2 hours to help them hold their shape. Bake at 392°F for about 10 minutes, or until the edges are lightly golden. Cool completely on a wire rack before decorating.
Make the Colored Chocolate
Melt about ¼ of the white chocolate chips/wafers in the microwave using short bursts.
Place them in a microwave-safe bowl and heat in 15–20 second bursts on medium power. Stir well after each burst (even if it looks like nothing has melted yet).
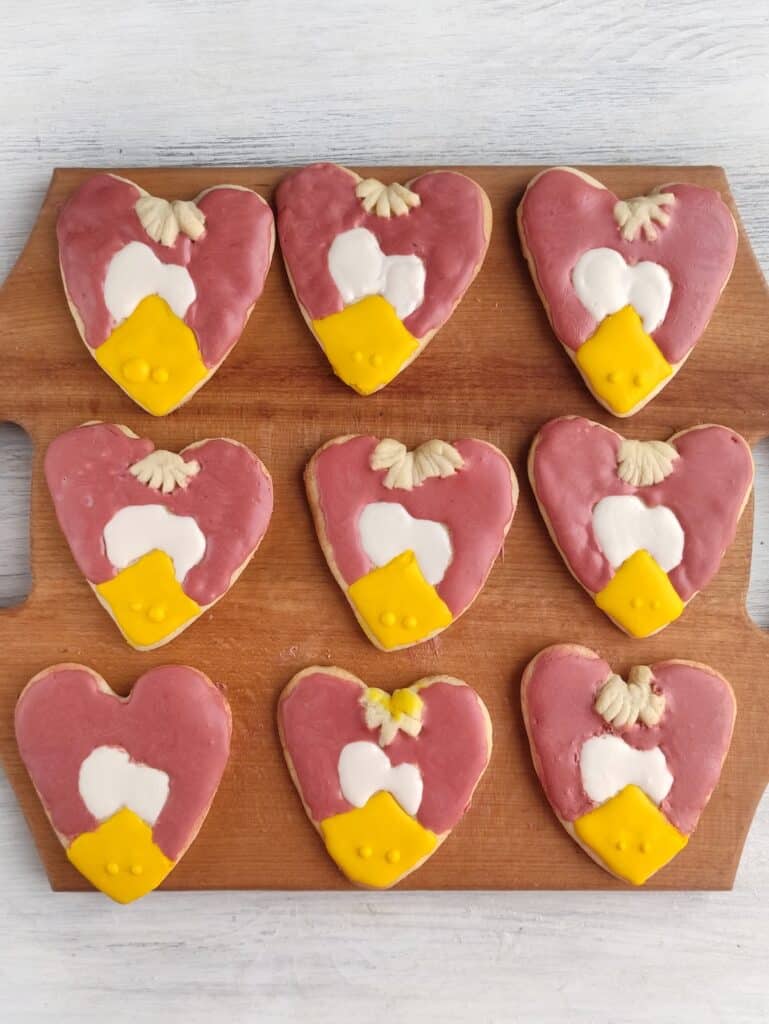
Once smooth, divide and tint with yellow food coloring.

Fill a piping bag and pipe small diamond shapes for the beaks, then fill them in. Let set, then add two tiny yellow dots on each cookie to finish the beak details.
Add the Eyes
Pipe circles of melted white chocolate to form the eyes, filling them in completely. Place the cookies in the refrigerator for 10 minutes so the eyes firm up.
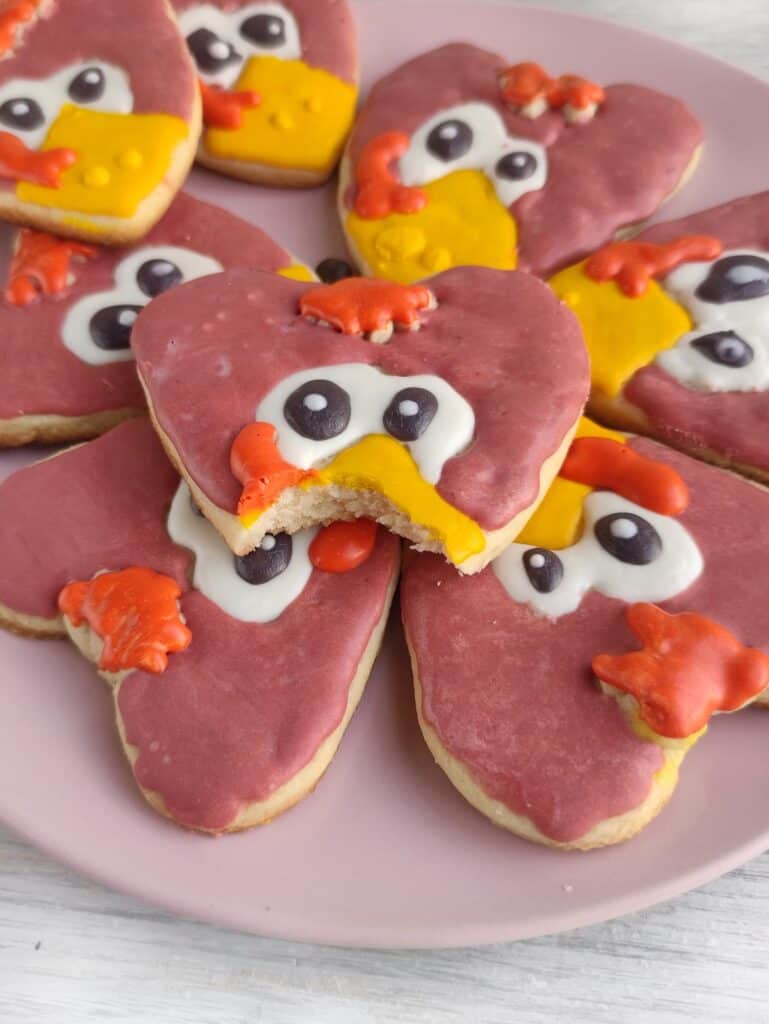
After chilling, add a small dot of dark chocolate (or place candy eyes) for the pupils.
Finish the Details
Tint more chocolate with red and brick tones. Use the red for the turkey’s comb and the brick red for feather accents. Add a tiny red piece for the wattle.

Refrigerate again until all the decorations are fully set before serving. Enjoy!
Tips and Notes
- Chill the Dough: Refrigerating shaped cookies before baking helps them hold their design and prevents spreading.
- Work in Batches: If your chocolate begins to harden, reheat it in short bursts until smooth again.
- Piping Bag Hack: No piping bag? Use a small zip-top bag and snip off a corner. It works perfectly for decorating.
- Set Between Layers: Place the decorated cookies in the fridge between each decorating step to keep the chocolate details crisp and neat.
Serving Suggestions
- Serve Warm with Milk: Enjoy these cookies fresh with a cold glass of milk.
- Holiday Dessert Board: Add them to a platter with fudge, brownies, and mini pies for a Thanksgiving dessert spread.
- Edible Favors: Wrap cookies in clear treat bags with ribbon and give them to guests as take-home treats.
- Table Decorations: Place one at each table setting as a festive and edible place card.
Storage and Reheating Instructions
- Store cookies in an airtight container at room temperature for up to 5 days.
- For longer storage, freeze undecorated cookies for up to 2 months, then thaw and decorate before serving.
- If freezing decorated cookies, place parchment between layers to avoid smudging.
- To refresh slightly stale cookies, warm them in a 300°F oven for 3–4 minutes.

Turkey Sugar Cookies Recipe
Ingredients
- 12 oz sugar cookie dough about ¾ pound
- ¾ cup white chocolate chips
- Food coloring: yellow red, and brick
- A little dark chocolate for pupils or candy eyes
Instructions
- Lightly flour your surface and roll the sugar cookie dough into a layer about ⅓–¼ inch thick. Use a heart-shaped cookie cutter to cut out shapes.
- Place them on a parchment-lined baking sheet, and from the leftover dough, form small scallops to press onto the top of each heart (this will create the turkey’s feathered look).
- Refrigerate the shaped cookies for 1–2 hours to help them hold their shape. Bake at 392°F for about 10 minutes, or until the edges are lightly golden. Cool completely on a wire rack before decorating.
- Melt about ¼ of the white chocolate chips/wafers in the microwave using short bursts.
- Place them in a microwave-safe bowl and heat in 15–20 second bursts on medium power. Stir well after each burst (even if it looks like nothing has melted yet).
- Fill a piping bag and pipe small diamond shapes for the beaks, then fill them in. Let set, then add two tiny yellow dots on each cookie to finish the beak details.
- Pipe circles of melted white chocolate to form the eyes, filling them in completely. Place the cookies in the refrigerator for 10 minutes so the eyes firm up.
- After chilling, add a small dot of dark chocolate (or place candy eyes) for the pupils.
- Tint more chocolate with red and brick tones. Use the red for the turkey’s comb and the brick red for feather accents. Add a tiny red piece for the wattle.
- Refrigerate again until all the decorations are fully set before serving. Enjoy!