Easter Bird’s Nests Recipe
Easter is just around the corner, and these adorable Bird’s Nest treats are the perfect way to celebrate the season with whimsy and sweetness. No baking is required – just a few simple ingredients, and you’ll have a delightful springtime dessert everyone will love.

My family has been making these delicious treats every Easter for years, and they always disappear within minutes of being served! For more springtime dessert ideas, check out my Easter Sugar Cookies and Carrot Cake With Cream Cheese Frosting.

Why You’ll Love This Recipe
- These bird’s nests are incredibly quick and easy to make – perfect for last-minute Easter gatherings.
- Kids love helping with this no-bake recipe, making it a wonderful family activity.
- The white chocolate and cornflake combination creates a delightful sweet crunch.
- They’re visually stunning on any Easter table or dessert spread.
- You can customize them in many ways to match your preferences or dietary needs.
Ingredients

- White Chocolate: Creates a creamy, sweet binding agent that holds the nest together while providing a smooth contrast to the crunchy cornflakes. Its subtle vanilla notes enhance the overall flavor profile of these treats.
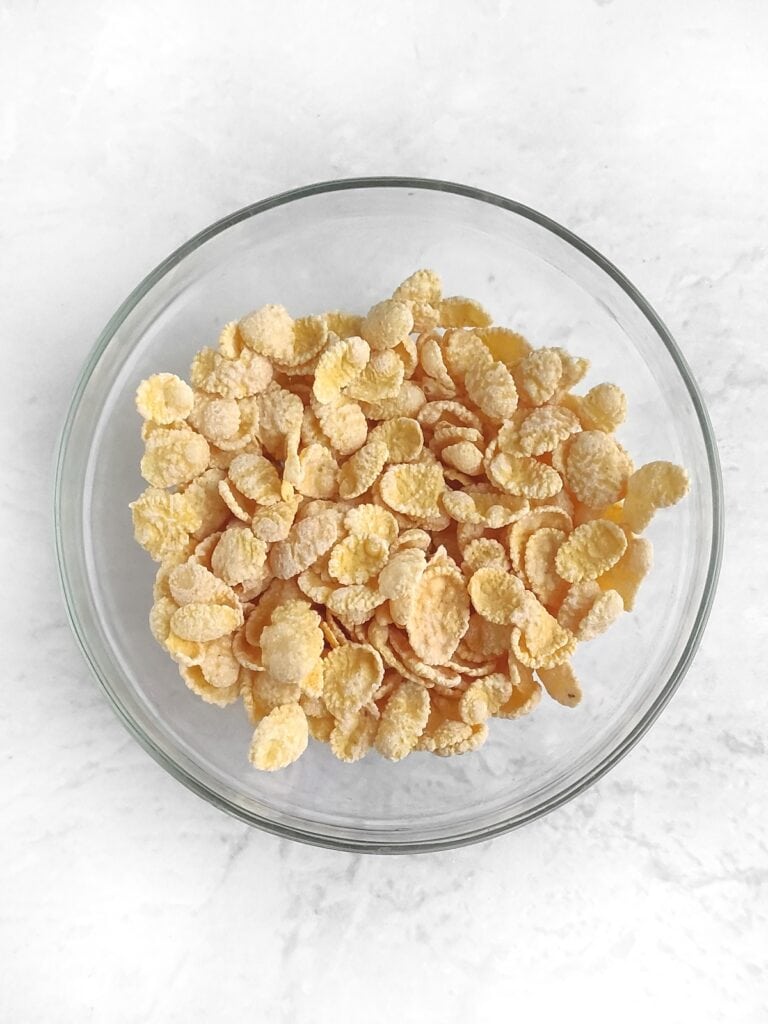
- Frosted Corn Flakes: Provide the perfect structure and texture that mimics twigs in a bird’s nest. They maintain their crunch even when coated with chocolate, creating that satisfying bite that makes these treats so addictive.
- Mini Chocolate Eggs: The crowning jewel of these nests, they represent new life and spring renewal. Their colorful shells add visual appeal, while their chocolate centers complement the white chocolate base.
- Green Chocolate Candy Melts: These vibrant green chocolate pieces represent fresh spring grass in your nests, adding a festive pop of color and sweet accent to the finished treats.
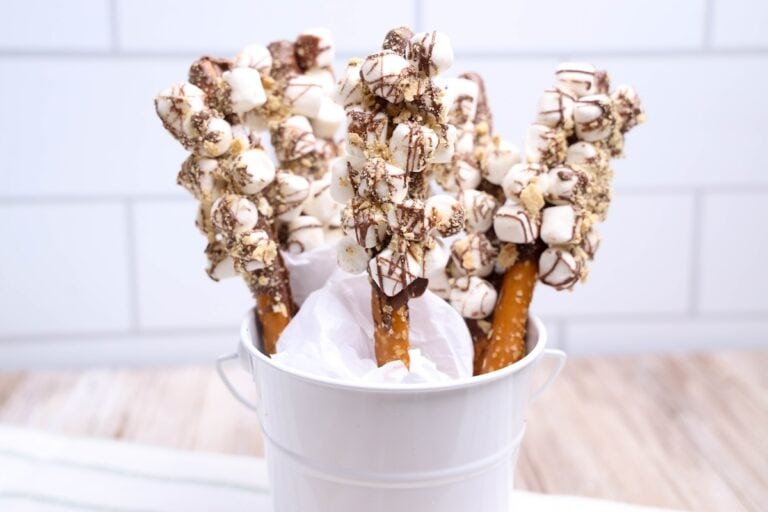
- OPTIONAL – Pretzel Sticks: These provide an excellent salty contrast to the sweet nests and create an artistic, natural element when coated with white chocolate. They mimic tree branches or twigs, adding dimension to your Easter display.
- OPTIONAL – Marshmallows: When attached to the pretzel sticks as shown in the image, they create the appearance of pussy willow buds or spring blossoms, enhancing the seasonal theme of your dessert presentation.
- OPTIONAL – Powdered Sugar: This fine, delicate sweetener adds a magical, snow-like dusting to the pretzel branches, creating the illusion of spring blossoms or morning frost.
Substitutions and Additions
- Cereal Options: Try rice krispies, shredded wheat, or chow mein noodles for different nest textures.
- Chocolate Variations: Substitute milk or dark chocolate if you prefer a less sweet base.
- Egg Alternatives: Use jelly beans, M&Ms, or marzipan shaped into eggs for different flavors and looks.
- Healthier Version: Use unsweetened cereal and sugar-free chocolate for a less indulgent treat.
- Flavor Enhancers: Add a teaspoon of vanilla extract or a pinch of sea salt to the melted chocolate for depth of flavor.
How To Make Easter Bird’s Nests
Prepare Your Ingredients
Begin by gathering all your ingredients on your countertop and ensuring your mixing bowl is completely dry, as any moisture can affect how the chocolate sets.
Place the cornflakes in the bowl, taking care not to crush them too much. You want to maintain their distinctive shape and crunch for the nest-like texture.
Melt the Chocolate
Take the white chocolate drops and place them in a separate microwave-safe bowl. To melt the chocolate properly, use your microwave for 20-second intervals, making sure to stir thoroughly between each interval. Alternately, you can melt the chocolate using a double boiler method.
Melt until your chocolate reaches a smooth, pourable texture similar to condensed milk.
If you’d like an even silkier consistency, you can add a teaspoon of butter to the melted chocolate and stir until fully incorporated.

Mix Chocolate and Frosted Corn Flakes
Once your chocolate is melted, pour it over the cornflakes in the bowl. Using a silicone spatula or wooden spoon, gently fold the mixture until all the cornflakes are evenly coated with the white chocolate.

Fill The Cupcake Liners
Next, set out paper cupcake liners on a flat, hard surface, or place them in a muffin tin for more uniform shapes. Spoon the chocolate-coated cornflake mixture into each liner, using the back of your spoon to create a small indentation in the center to form a nest shape.
While the chocolate is still soft, sprinkle pieces of green candy melts around the edges of the nests to represent fresh spring grass.

Add The Chocolate Eggs
With your nests formed, carefully place 3-4 mini chocolate eggs in the center indentation of each nest. For the most attractive presentation, use a variety of pastel colors like blue, yellow, and speckled white eggs, as shown in the image.
Refrigerate
Once assembled, transfer your nests to the refrigerator and let them chill for 15-20 minutes until the chocolate has completely set and the nests hold their shape firmly.

OPTIONAL: Create the Pretzel Branch Decorations
To make the decorative pretzel branches, select thin pretzel sticks from your package. Melt some additional white chocolate or candy coating and dip each pretzel stick, leaving small portions uncovered to create a natural, branch-like appearance.
While the coating is still wet, gently press mini marshmallows or white chocolate chips onto the sides of the pretzel sticks to create the appearance of little buds or blossoms.
For an extra special touch, lightly dust these decorated pretzels with powdered sugar to give them a delicate, springtime look. Allow these decorative elements to set completely on a piece of parchment paper before handling.
When you’re ready to serve, artfully arrange these pretzel branches alongside your chocolate nests on a serving plate to create a complete spring scene that will charm your guests.
Tips and Notes
- Make sure your bowl is completely dry before melting the chocolate – any moisture can cause the chocolate to seize.
- When melting chocolate in the microwave, short intervals are key to prevent burning.
- For perfectly shaped nests, use the back of a spoon to create an indentation in the center of each nest.
- Work quickly once the chocolate is melted, as it will begin to set at room temperature.
- For a more rustic look, use your clean fingers to shape the nests instead of molds.
- Don’t worry if some cornflakes fall loose on the plate – this adds to the natural, nest-like appearance.

Serving Suggestions
- Display these treats on a bed of edible Easter grass for an eye-catching dessert table centerpiece.
- Pair with a glass of milk for children or a dessert wine for adults.
- Serve alongside fresh berries to add a fruity element to your Easter dessert spread.
- Create a dessert board with these nests as the star, surrounded by Easter cookies and chocolate bunnies.
- Arrange the pretzel branches artfully around the nests, as shown in the image, for an elevated presentation.
Storage and Reheating Instructions
- Store in an airtight container in the refrigerator for up to 5 days.
- For best results, separate layers with parchment paper to prevent sticking.
- These treats can be made up to 2 days in advance of your event.
- They do not require reheating and are best enjoyed cold, straight from the refrigerator.
- Not suitable for freezing as the texture of the cornflakes may become soggy upon thawing.
- Store the decorated pretzel branches separately from the nests until serving to maintain their delicate appearance.

Easter Bird’s Nests Recipe
Ingredients
- 3 ounces white chocolate drops
- 2 cups corn sugar flakes
- 1/3 cup mini chocolate eggs
- 2 tablespoons green chocolate candy melts
Optional:
- 6 Pretzel Sticks
- 6 Marshmallows
- Powdered Sugar
Instructions
Prepare Your Ingredients
- Begin by gathering all your ingredients on your countertop and ensuring your mixing bowl is completely dry, as any moisture can affect how the chocolate sets.
- Place the cornflakes in the bowl, taking care not to crush them too much. You want to maintain their distinctive shape and crunch for the nest-like texture.
Melt the Chocolate
- Take the white chocolate drops and place them in a separate microwave-safe bowl. To melt the chocolate properly, use your microwave for 20-second intervals, making sure to stir thoroughly between each interval. Alternately, you can melt the chocolate using a double boiler method.
- Melt until your chocolate reaches a smooth, pourable texture similar to condensed milk.
- If you’d like an even silkier consistency, you can add a teaspoon of butter to the melted chocolate and stir until fully incorporated.
Mix Chocolate and Frosted Corn Flakes
- Once your chocolate is melted, pour it over the cornflakes in the bowl. Using a silicone spatula or wooden spoon, gently fold the mixture until all the cornflakes are evenly coated with the white chocolate.
Fill The Cupcake Liners
- Next, set out paper cupcake liners on a flat, hard surface, or place them in a muffin tin for more uniform shapes. Spoon the chocolate-coated cornflake mixture into each liner, using the back of your spoon to create a small indentation in the center to form a nest shape.
- While the chocolate is still soft, sprinkle pieces of green candy melts around the edges of the nests to represent fresh spring grass.
Add The Chocolate Eggs
- With your nests formed, carefully place 3-4 mini chocolate eggs in the center indentation of each nest. For the most attractive presentation, use a variety of pastel colors like blue, yellow, and speckled white eggs, as shown in the image.
Refrigerate
- Once assembled, transfer your nests to the refrigerator and let them chill for 15-20 minutes until the chocolate has completely set and the nests hold their shape firmly.
OPTIONAL: Create the Pretzel Branch Decorations
- To make the decorative pretzel branches, select thin pretzel sticks from your package. Melt some additional white chocolate or candy coating and dip each pretzel stick, leaving small portions uncovered to create a natural, branch-like appearance.
- While the coating is still wet, gently press mini marshmallows or white chocolate chips onto the sides of the pretzel sticks to create the appearance of little buds or blossoms.
- For an extra special touch, lightly dust these decorated pretzels with powdered sugar to give them a delicate, springtime look. Allow these decorative elements to set completely on a piece of parchment paper before handling.
- When you’re ready to serve, artfully arrange these pretzel branches alongside your chocolate nests on a serving plate to create a complete spring scene that will charm your guests.