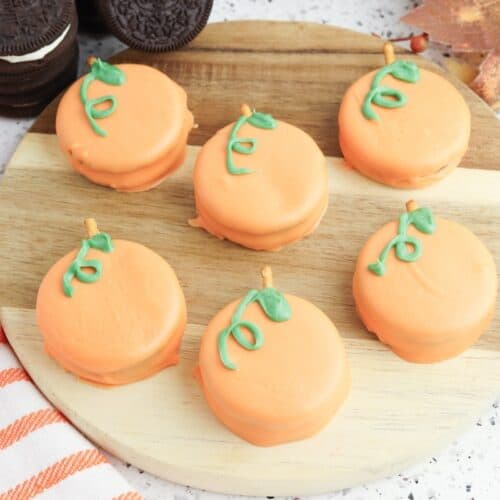
Easy Pumpkin Oreos
If you're looking for a fall treat that's fun to make and even more fun to eat, these Oreo Pumpkins are it. With just a few simple ingredients, you can turn basic cookies into the cutest little pumpkins - no baking required. They're perfect for classroom parties, weekend movie nights, or a quick project with the kids.
Ingredients
- 30 Oreo Double Stuf cookies
- 15 pretzel sticks broken in half
- 12 ounces orange candy melts
- ½ cup green melting candy
Instructions
- Gently press half a pretzel stick into the top of each Oreo cookie. Try to go through the cream center so the cookie stays intact.
- Follow the package instructions to melt the orange candy melts in a microwave-safe bowl. Stir until smooth.
- Place an Oreo on a fork, then spoon melted orange candy over the top until fully coated. Tap the fork on the edge of the bowl to let any excess drip off.
- Transfer the coated Oreo onto a sheet of parchment paper. Let the orange coating cool and harden completely before decorating.
- Melt the green candy melts and transfer the mixture to a piping bag (or use a plastic sandwich bag with the tip cut off). Pipe a small leaf and vine shape near the pretzel stem.
- Let the green candy cool and harden. Once set, the pumpkins are ready to serve or package for gifting. Enjoy!
Notes
Don’t Skip the Parchment: Lining your surface with parchment paper prevents sticking and makes cleanup much easier.
Tap the Fork Gently: After coating the Oreo, lightly tap the fork handle on the bowl to create a smooth, even layer and let the excess drip off.
Melt in Batches: If you're making a full batch of 30, melt the candy coating in smaller portions so it stays silky and easy to work with throughout the process.
Use a Fork, Not Tongs: A fork provides better control and allows excess coating to drip through the tines, making for a cleaner finish.
Let Them Set Completely: Be patient! Wait until both the orange and green candy melts are fully hardened before handling or packaging.